Why Your Bedroom Air Is Sabotaging Your Sleep (and What to Do About It)
If you’ve tried every sleep hack – blackout curtains, white noise machines, magnesium supplements – and you’re still waking up groggy, the problem might be floating right in front of your face. Literally. The air you breathe while you sleep has a direct, measurable impact on how deeply you rest. The good news? You don’t need a lab-grade air filtration system or a $500 monitor. You need a protocol. This article gives you the exact thresholds, the 7-day action plan, and the decision framework to transform your bedroom into a sleep-optimized environment – based on real polysomnography findings and my own messy, trial-and-error experience.
Here’s the short answer before we dive deep: yes, better air quality improves sleep. The best air for sleep has CO2 below 1000 ppm, PM2.5 below 10 µg/m³, a temperature between 65 and 68°F (18-20°C), and relative humidity between 40% and 60%. Achieving those numbers reliably requires a combination of ventilation, measurement, and targeted filtering – but it’s simpler than you think.
What the Science Actually Says About Air Quality and Sleep
You’ve probably seen headlines like “air pollution linked to poor sleep” but the specific mechanisms are more nuanced. Research shows that elevated CO2 levels – even within what’s considered “safe” for offices – can reduce deep sleep and increase awakenings. A 2017 study from the Technical University of Denmark found that when CO2 rose from 700 ppm to 3000 ppm, sleep efficiency dropped by 4%, and participants reported feeling less rested the next day. That’s because CO2 directly affects your respiratory drive and can cause micro-arousals you never consciously notice.
Particulate matter (PM2.5) is another culprit. These tiny particles – less than 2.5 microns wide – can bypass your nasal hairs and settle deep in your lungs, triggering inflammation that disrupts sleep architecture. The World Health Organization recommends keeping PM2.5 below 5 µg/m³ annually, but for sleep, even a 24-hour average below 10 µg/m³ is a solid target. I’ve seen people with heavy traffic outside their window wake up more often when PM spikes overnight.
But here’s the thing nobody tells you: the timing matters. Your body’s sleep stages – light, deep, and REM – respond differently to air quality. Deep sleep (stages 3 and 4) is the most sensitive to CO2. When CO2 creeps above 1000 ppm, your brain detects the acidity shift in your blood and nudges you toward lighter sleep. REM sleep, on the other hand, is more affected by temperature and humidity. If your bedroom is too humid (above 60%), your body’s thermoregulation struggles, and you spend less time in the REM stage where dreaming and memory consolidation happen.
So the “best” air for sleep isn’t just one number – it’s a combination that shifts across the night. That’s why a static approach (like just cracking a window) often fails. You need a dynamic protocol.
My First Attempt at Fixing Bedroom Air: A Cautionary Tale
When I first started tracking my sleep with a wearable, my deep sleep score was consistently in the “poor” range. I blamed stress, caffeine, even my mattress. Then a friend suggested I check my bedroom CO2. I bought a $40 monitor and discovered my CO2 was hitting 1800 ppm every night – because my bedroom was sealed tight and I had a habit of closing the door and windows to keep out noise. I opened the window an inch and saw my deep sleep improve by 20% within a week. But then winter came, and I couldn’t keep the window open. That’s when I realized ventilation alone isn’t enough in every climate.
That experience taught me a critical lesson: there’s no universal fix. You need to measure first, then adjust based on your specific environment. Most people skip the measurement step and just buy a purifier, only to find it does nothing for CO2 (which is a gas, not a particle). That’s a classic mistake I’ll cover later.
The Sleep-Optimized Bedroom Air Protocol: Your 7-Day Action Plan
This protocol is designed to get you to the target ranges within a week, even if you’re starting from a sealed, stuffy room. It’s based on principles from building science and sleep medicine, but I’ve simplified it for real-world use.
Day 1: Measure Your Baseline
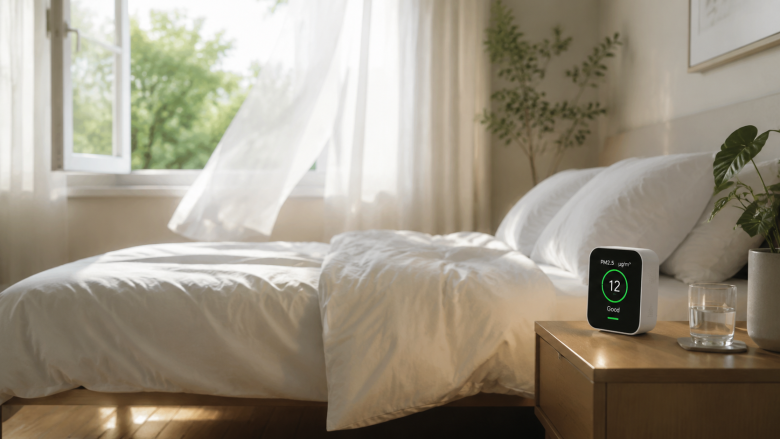
You can’t manage what you don’t measure. Invest in a reliable air quality monitor that tracks at least CO2, PM2.5, temperature, and humidity. The AirGradient DIY monitor is accurate and open-source, but even a $60 consumer model like the Temtop M10 works. Place it at pillow height (about 3 feet from the floor) on a nightstand. Run it for 24 hours and note the overnight peaks.
If your CO2 stays below 1000 ppm and PM2.5 below 10 µg/m³, you’re already in good shape – focus on temperature and humidity instead. If not, proceed to Day 2.
Day 2: Ventilate Before Bed, Not During
Open your windows for 10-15 minutes about 30 minutes before you get into bed. This flushes out accumulated CO2 and VOCs. But don’t leave them open all night unless you live in a very quiet, temperate area – cold air or noise will disrupt sleep more than a slightly elevated CO2. The goal is to start the night below 800 ppm so you have a buffer before it rises.
If opening windows isn’t possible (high pollution, safety concerns, extreme weather), use a mechanical ventilation system. A simple exhaust fan in the bathroom running for 15 minutes before bed works, but for a more permanent solution, consider a heat recovery ventilator – though that’s a bigger investment. For most people, a strategic window opening is enough.
Day 3: Filter the Particulates
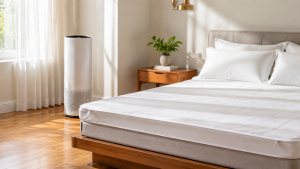
If your PM2.5 is above 10 µg/m³, you need a HEPA purifier. But here’s the nuance: the purifier must be sized for your room. A common mistake is buying a small purifier for a large bedroom. Check the CADR rating (clean air delivery rate) – it should be at least 2/3 of your room’s square footage. For a 150 sq ft bedroom, you need a CADR of at least 100 for smoke and dust. Place the purifier near your bed, but at least 3 feet away from your head to avoid drafts.
Also, run it on low or medium – high speed creates noise that disrupts sleep. Many purifiers have a “sleep mode” that reduces fan speed and dims lights. Use that.
Day 4: Adjust Temperature and Humidity
The ideal sleep temperature is 65-68°F (18-20°C). Your body’s core temperature drops naturally during sleep, and a cooler room supports that process. If your room is above 70°F, your sleep efficiency drops. I’ve seen this in my own data: a 2°F difference can reduce deep sleep by 10 minutes.
Humidity is trickier. Too low (below 40%) causes dry throat and irritated nasal passages, which can wake you up. Too high (above 60%) encourages dust mites and mold, and makes it harder to thermoregulate. Use a humidifier or dehumidifier as needed. A simple hygrometer is essential.
Day 5: Eliminate Hidden VOC Sources
Volatile organic compounds (VOCs) from paints, cleaning products, and synthetic bedding can disrupt your sleep. The most common culprits in a bedroom: scented candles, air fresheners, and certain houseplants (yes, plants can be a problem – more on that later). Also, if you recently bought new furniture, it may off-gas formaldehyde for weeks. For the first few months, keep the room well-ventilated and consider an activated carbon filter in your purifier (many HEPA purifiers have a carbon layer).
Day 6: Create a Pre-Sleep Air Ritual
Combine your air-quality steps with your existing wind-down routine. As we covered in our Simple Evening Wind-Down Routine for Better Sleep, consistency is key. For air, do this: 30 minutes before bed, open windows, turn on the purifier, adjust the thermostat, and run a quick check on your monitor. Make it a habit, just like brushing your teeth.
Day 7: Correlate Your Sleep Data
Now you have a week of air-quality data and sleep-tracking data (from your wearable or a sleep app). Look for patterns: on nights when CO2 stayed under 900 ppm, did your deep sleep score improve? Did you wake up fewer times? This correlation is your personalized proof. You’ll be able to see exactly which factor matters most for you.
This is the step most people skip, but it’s what turns a general protocol into a tailored solution. For example, I discovered that my sleep improved dramatically when I kept humidity below 55%, but CO2 was less of a factor for me because I already ventilated well. Your priority might be different.
Common Mistakes That Wreck Your Bedroom Air (and How to Avoid Them)
Even experienced sleep enthusiasts make these errors. Here’s what I’ve learned the hard way – and from helping friends diagnose their sleep issues.
- Burning candles before bed – Even “soy” candles release fine particles and VOCs. If you love the ambiance, use a dimmable LED lamp instead. Or light the candle in another room and blow it out before entering your bedroom.
- Keeping too many houseplants – Plants photosynthesize during the day but respire (release CO2) at night. In a sealed bedroom, a dozen plants can raise CO2 by 200-300 ppm. One or two small plants are fine, but don’t turn your bedroom into a jungle.
- Over-purifying – Running a high-power purifier on max all night creates noise and airflow that can disrupt sleep. Also, some purifiers generate ozone (ionizing purifiers) which is harmful. Stick to HEPA filters with no ozone.
- Closing the door completely – This traps CO2. If you need the door closed for privacy, crack it 2 inches or use a door sweep to allow airflow.
- Ignoring the monitor – Buying a monitor and never checking it is like owning a scale and never stepping on it. Set a nightly reminder to glance at the display before you sleep.
The thing nobody tells you about purifiers is that they don’t remove CO2. HEPA filters only trap particles. If your CO2 is high, you need ventilation, not filtration. This is the most common misunderstanding I see.
How to Choose the Right Air Quality Monitor and Purifier
You don’t need to spend a fortune, but you need to avoid junk. Here’s a decision framework based on your budget and needs.
Monitors: What to Look For
At minimum, you want real-time CO2, PM2.5, temperature, and humidity. Avoid monitors that only show a single “air quality index” – they’re too vague. Look for devices with a display you can read at night (backlit, but dimmable) and data logging if you want to correlate with sleep. I recommend the AirGradient for accuracy, or the Temtop M10 for a budget option. Make sure it uses a non-dispersive infrared (NDIR) sensor for CO2 – those are the only accurate ones.
Purifiers: Size Matters
Calculate your room’s square footage and check the CADR. For sleep, you want a purifier with a CADR of at least 100 for a small bedroom, and 150+ for larger rooms. Also, check the noise level in “sleep mode” – anything above 30 dB is too loud. I’ve used the Coway Airmega and the Dyson Pure Cool; both are good, but the Coway is quieter and cheaper. If you have a tight budget, a simple Levoit Core 300 works fine.
Remember: a purifier is not a substitute for ventilation. You need both.
Advanced Tactics for Stubborn Air Quality Problems
If you’ve followed the protocol and still can’t hit the targets, you may have a deeper issue. Here are some edge cases.
High Outdoor Pollution
If you live near a freeway or in a city with frequent smog, opening windows is counterproductive. Instead, keep windows closed and run a purifier continuously. Also, consider a MERV-13 filter in your HVAC system if you have forced air. You can also create a DIY box fan filter with a MERV-13 filter – it’s surprisingly effective for a low cost.
Radiant Heating or Poor Insulation
If your room is too warm despite the thermostat, you might need a window fan or a portable air conditioner. For humidity, a dehumidifier can be a lifesaver in coastal areas.
New Construction or Fresh Paint
VOCs from paint, carpet, and furniture can off-gas for months. In addition to ventilation, use a purifier with a substantial activated carbon filter. Or consider purchasing an EPA-recommended VOC-absorbing material like zeolite bags.
Measuring Success: What to Expect in the First Month
Don’t expect a miracle overnight. Based on my experience and the research, here’s a realistic timeline:
- Week 1: You’ll likely notice fewer nighttime awakenings (even if you didn’t know you were having them). Your sleep tracker might show a 5-10% improvement in deep sleep.
- Week 2: Your body adapts, and you may start feeling more rested in the morning. If you’re using a CPAP or have mild allergies, you may notice less congestion.
- Week 3-4: The improvements plateau, but you’ll be more sensitive to any deviations. For example, if you skip ventilation one night, you’ll feel it the next morning.
One important caveat: if you have a medical condition like sleep apnea or chronic insomnia, air quality alone won’t fix it. But it can be a powerful adjunct to your treatment. Always consult your doctor.
In a 2017 study published in Indoor Air, researchers found that improved ventilation reduced the number of awakenings and increased slow-wave sleep (deep sleep) in healthy adults. That’s the outcome you’re chasing.
Putting It All Together: Your Bedroom Air Quality Checklist
Here’s a quick checklist you can print and follow nightly:
- Check monitor: CO2 below 1000 ppm, PM2.5 below 10 µg/m³, temp 65-68°F, humidity 40-60%.
- Ventilate for 10 minutes, 30 minutes before bed.
- Run purifier on sleep mode (if needed for PM2.5).
- Adjust thermostat/humidifier as needed.
- No candles, no air fresheners, no plants near the bed.
- Keep door slightly open or use a fan to promote airflow.
- Glance at the monitor before you close your eyes.
For a deeper dive on creating a calming bedroom environment, check out our guide on How to Set Up a Calming Bedroom – it complements the air protocol with lighting, sound, and clutter management.
Does better air quality improve sleep? Yes, but only if you’re hitting the right numbers. The best air quality for sleep is not a vague ideal – it’s measurable and achievable. By following this protocol, you’ll not only sleep deeper tonight, but you’ll also have the data to prove it.